Emergency Plumber Navy Yard: Leaking Water Heater Guide
Water heater leaking in Navy Yard, DC? Discover immediate emergency steps, causes, repair costs, and when to call an emergency plumber

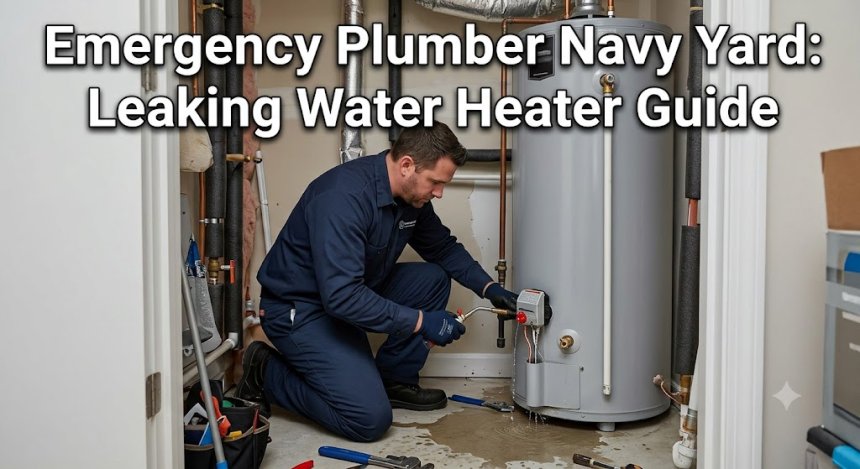
What to Do When Your Water Heater Starts Leaking in Navy Yard
A leaking water heater is one of the most urgent residential emergencies a property owner can face. In Navy Yard—one of Washington, DC’s fastest-growing waterfront neighborhoods—modern high-rise condominiums, luxury apartment complexes along M Street SE, and surrounding historic brick row homes rely heavily on water heating systems operating around the clock.
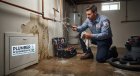
Whether your unit sits in a tight closet of a Navy Yard condo near Nationals Park or in the basement of a restored Capitol Hill row home, an unaddressed water heater leak can quickly escalate. Water escaping under 50 to 80 PSI of incoming pressure can saturate subfloors, ruin hardwood, seep into neighboring condo units below, and trigger electrical failures within minutes.
Understanding how to immediately contain a leaking water heater, recognizing whether the leak stems from a simple valve or a compromised tank, and knowing when to call an emergency plumber can protect your property from tens of thousands of dollars in water damage.
What Is an Emergency Water Heater Leak?
An emergency water heater leak occurs when hot water escapes from any component of a storage tank or tankless water heater system beyond standard condensed moisture or minor temperature relief discharge.
Water heaters contain pressurized heated water at temperatures between 120°F and 140°F. When corrosion perforates the inner steel tank, or when a pressure relief valve fails under excessive thermal expansion, water breaches the system's structural perimeter.
Common Situations in Navy Yard
-
High-Rise Condo Closet Leaks: Tankless or compact electric water heaters installed in enclosed utility closets leaking through drywalls and flooring into adjacent or lower residential units.
-
Basement Utility Room Flooding: Traditional 40 to 80-gallon gas or electric storage tanks pooling water across mechanical room floors in older townhomes near the Anacostia River.
-
High Water Pressure Blowouts: Municipal water main pressure spikes forcing aged temperature and pressure relief valves to discharge uncontrollably.
Immediate Symptoms
-
Puddles or standing water accumulating around the base of the water heater tank.
-
Active dripping or spraying from the top pipe connections, brass valves, or lower drain spigots.
-
Rusty, discolored, or muddy hot water flowing from indoor faucets.
-
Hissing, popping, or crackling noises coming from the heater while actively firing or heating.
-
Damp drywall, buckled flooring, or water stains on ceilings directly below utility closets.
Why Does This Plumbing Problem Happen in Navy Yard?
Water heater leaks in Washington, DC are driven by specific local water characteristics, building infrastructure, and mechanical wear.
1. Hard Water & Mineral Sediment Buildup
Water supplied throughout the District contains dissolved calcium and magnesium minerals. Over years of continuous heating, these minerals precipitate out of solution and settle as a dense layer of sediment at the bottom of storage tanks. This sediment layer insulates water from lower heating elements or burner flames, causing localized overheating that warps and cracks internal glass linings and steel tanks.
2. High Municipal Water Pressure
To supply upper floors of multi-story buildings across Ward 6, municipal water mains maintain high pressure. If your home lacks a properly calibrated Pressure Reducing Valve (PRV) or a functional thermal expansion tank, thermal expansion creates extreme pressure surges inside the heater tank every time water heats up.
3. Galvanic & Chemical Corrosion
When dissimilar metals (such as copper supply pipes and steel water heater nipples) join without proper dielectric unions, an electrical reaction occurs that slowly eats away at the metallic threads. Additionally, once a tank's internal sacrificial anode rod completely dissolves, corrosive minerals attack the inner steel wall directly.
4. Excessive Thermal Expansion
Water expands in volume when heated. In closed plumbing systems with backflow preventers or check valves, this expanding volume has nowhere to go. Without a functional thermal expansion tank attached above the heater, repeating pressure spikes stress tank welds, pipe joints, and valve seals until they fail.
5. Aging Fixtures & Component Fatigue
Most standard tank water heaters have an average lifespan of 8 to 12 years, while tankless units last 15 to 20 years. As components age, rubber gaskets harden, temperature and pressure (T&P) valves seize, and copper connections fatigue under constant thermal stress.
Signs You Should Never Ignore
Catching early indicators of water heater breakdown allows you to replace or repair components before a catastrophic tank rupture occurs:
| Warning Sign | What It Indicates | Action Required |
| Rusty or Discolored Hot Water | Internal tank corrosion or failing anode rod | Schedule an immediate plumbing inspection |
| Popping or Rumbling Noises | Heavy sediment buildup overheating the tank floor | Flush the tank and inspect structural integrity |
| Water Moisture Near Base | Micro-fracture in inner tank wall or fitting leak | Isolate unit and call an emergency plumber |
| Frequent T&P Valve Drips | Excessive line pressure or dangerous overheating | Test pressure reducing valve & thermal tank |
| Sudden Lack of Hot Water | Heating element failure or electrical breach | Shut power off and inspect connections |
Common Plumbing Problems Related to Water Heater Leaks
When a water heater fails, the resulting water volume and pressure surges can create secondary mechanical failures throughout your home:
-
Thermal Expansion Tank Failure: Excess system pressure can rupture the internal rubber bladder of an expansion tank, rendering it useless and worsening pressure spikes.
-
Corroded Supply Line Flex Hoses: Corroded braider flex lines or copper connectors can snap completely under sudden movements or severe leaks.
-
Subfloor & Ceiling Structural Water Damage: Escaping water easily penetrates floor gaps, traveling along joists and destroying ceiling plaster or drywall in lower apartment suites.
-
Short-Circuited Electrical Components: Leaking water dripping onto electric heating element terminal boxes or lower thermostat controls creates immediate electrical short circuits and tripping breakers.
Step-by-Step Professional Repair Process
When an emergency plumber arrives at your Navy Yard property, they follow a systematic safety and diagnostic protocol to resolve the leak cleanly:
[Step 1: Emergency System & Energy Isolation]
                       │
                       ▼
[Step 2: Non-Invasive Leak Diagnostics & Thermal Imaging]
                       │
                       ▼
[Step 3: Controlled System Draining & Pressure Relief]
                       │
                       ▼
[Step 4: Component Repair OR Tank Replacement Execution]
                       │
                       ▼
[Step 5: Code-Compliant Reconnection & Dielectric Isolation]
                       │
                       ▼
[Step 6: System Filling, Bleeding & Temperature Callibration]
                       │
                       ▼
[Step 7: Safety Testing & Preventative Maintenance Review]
Step 1: Emergency System Isolation
The plumber immediately shuts off the main cold water inlet valve to stop water from feeding the leak. Power is disconnected at the breaker panel for electric units, or gas supply lines are safely shut off at the gas valve for natural gas units.
Step 2: Diagnostic Inspection
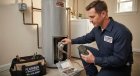
Technicians inspect top supply fittings, dielectric unions, thermal expansion tanks, temperature-and-pressure (T&P) relief valves, drain valves, and lower heating element gaskets. Infrared imaging or moisture tools verify whether the leak is a repairable external component or an un-repairable internal tank fracture.
Step 3: Controlled Draining
If the tank must be replaced or opened, commercial hose pumps drain remaining scalding water safely down building drain stacks or exterior outlets without spilling onto living space floors.
Step 4: Component Replacement or Full Unit Installation
-
For External Component Leaks: Plumbers replace faulty T&P valves, rebuild corroded copper line joints using press-fit fittings, or replace failed expansion tanks.
-
For Tank Fractures: The old unit is disconnected, removed, and replaced with an energy-efficient modern tank or high-efficiency tankless system that complies with current District of Columbia plumbing codes.
Step 5: Safety Testing & Calibration
After filling the new or repaired system and purging air from indoor fixtures, the plumber tests working pressure, verifies thermostat temperature settings (typically calibrated to 120°F for safety), and checks all connections under full line pressure.
Can You Fix a Leaking Water Heater Yourself?
While homeowners can perform basic emergency containment steps, repairing or replacing a pressurized water heater requires licensed plumbing expertise to ensure building safety and code compliance.
Safe DIY Actions You CAN Take
-
Shut Off the Cold Water Supply Valve: Turn the cold water inlet valve located above the water heater clockwise to stop incoming water pressure.
-
Turn Off Electrical Power or Gas: Flip the dedicated double-pole breaker serving the electric water heater, or turn the gas control knob to "OFF" on gas units.
-
Clear the Surrounding Area: Move furniture, boxes, and valuables out of the utility closet or basement floor to minimize water damage.
-
Attach a Hose to Drain Valve (If Safe): If water is pooling on the floor and you have accessible drainage, attach a standard garden hose to the lower drain valve and open it carefully to relieve internal water volume.
Dangerous DIY Practices to AVOID
-
NEVER Plug a Leaking Tank Hole: Attempting to screw bolts, apply epoxy, or plug a corroded hole in a pressurized tank can cause a sudden, explosive rupture.
-
NEVER Cap Off a Discharging T&P Relief Valve: Capping a leaking pressure relief valve eliminates the tank's primary safety relief mechanism, creating a dangerous pressure build-up risk.
-
NEVER Work on Gas Lines or High-Voltage Circuits Without Certification: Improper gas line reconnections risk carbon monoxide buildup or gas leaks, while 240-volt electric circuits pose severe shock hazards.
Advanced Tools Professional Plumbers Use
Licensed emergency plumbers utilize modern specialized diagnostic and repair tools to protect urban residential properties:
-
Digital Thermal Imaging Cameras: Detects exact temperature variations through walls and utility jackets to locate hidden leaks or failing internal insulation.
-
Hydraulic Press Tooling (ProPress): Forms permanent, flame-free, watertight copper pipe joints instantly in tight utility closets where torches cannot be used safely.
-
Commercial Water Extraction Pumps: Rapidly drains dozens of gallons of hot water directly out of multi-story condo units without relying on slow gravity drainage.
-
Digital Water Pressure Gauges: Measures incoming municipal pressure and thermal expansion spikes accurately to calibrate pressure reducing valves.
How Long Does the Repair Usually Take?
Repair and replacement timelines depend on the severity of the leak, accessibility, and unit type:
-
T&P Valve, Flex Hose, or Expansion Tank Replacement: 1 to 2 hours.
-
Heating Element or Thermostat Replacement: 1 to 3 hours.
-
Full Tank Water Heater Replacement: 3 to 5 hours (includes removal, line modification, and code-compliant installation).
-
Tankless Water Heater Conversion or Unit Swap: 4 to 8 hours.
Cost Factors in Water Heater Repairs
Understanding the variables that influence overall repair pricing helps property owners make informed decisions during an emergency.
Plumbing repair costs vary depending on the severity of the problem, accessibility, materials required, emergency service, property type, and local labor rates.
Key Cost Factors
-
Diagnostic & After-Hours Emergency Mobilization: Service calls during midnight hours, weekends, or severe storm events carry premium dispatch rates.
-
Repair vs. Complete Replacement: Replacing a single valve or heating element is significantly less costly than removing and installing a new 50-gallon tank.
-
Property Accessibility: Navigating tight high-rise utility closets, narrow stairwells, or historic row house basements requires additional labor time and care.
-
Permitting & Code Requirements: Official District of Columbia building permits, thermal expansion tanks, and code-mandated drain pans increase total project scope.
-
Fuel Source & Equipment Type: High-efficiency gas tankless units or heat-pump hybrid water heaters carry higher equipment costs than basic electric storage tanks.
Hidden Truths Homeowners Should Know
-
Small leaks become catastrophic ruptures fast: A minor drip at a rusted weld seam can blow out entirely overnight under 60 PSI of line pressure.
-
Cheap temporary patches always fail: Putty, tape, or quick-seal epoxies cannot withstand heated, pressurized water and will blow off within hours.
-
Homeowners insurance may reject claims without maintenance records: Insurance companies frequently deny water damage claims if evidence shows a water heater was neglected past its reasonable operational lifespan.
-
Hard water significantly cuts heater lifespan: Un-flushed sediment acts like an insulator, burning out electric elements and cracking lower tank walls years prematurely.
-
Sacrificial anode rods are the secret to long tank life: Replacing your water heater's anode rod every 3 to 5 years can double the operational lifespan of your tank.
-
DIY plumbing mistakes can void manufacturer warranties: Manufacturers often require proof of professional installation by a licensed plumber to honor warranty replacement claims.
-
Ignoring small leaks creates rapid mold growth: Escaping moisture trapped behind drywall or under subfloors germinates toxic mold spores in under 48 hours.
-
High water pressure quietly ruins fixtures: Operating water lines above 80 PSI degrades appliance valves, toilet flappers, and water heater tanks continuously.
-
Water heaters in closets MUST have drain pans: Installing a code-compliant drain pan routed to a suitable drain prevents catastrophic floor saturation when leaks occur.
-
Annual flushing saves money on energy bills: Removing accumulated mineral sediment restores heating efficiency, reducing monthly utility bills.
15 Common Mistakes Homeowners Make
-
Ignoring Minor Floor Dampness Near the Heater Base: Assuming a small puddle is just condensation allows internal corrosion to spread unchecked.
-
Setting Water Heater Temperatures Above 140°F: Excessively high heat accelerates internal tank corrosion, scales pipes faster, and increases scalding risks.
-
Capping or Blocking a Dripping Pressure Relief Valve: Eliminates safety pressure relief, creating extreme pressure risks.
-
Failing to Replace the Anode Rod Periodically: Allows aggressive minerals to devour the inner steel tank lining once the rod dissolves.
-
Connecting Dissimilar Metals Without Dielectric Unions: Causes rapid galvanic corrosion that destroys pipe threads and leaks water.
-
Leaving Power ON to an Empty Electric Tank: Operating electric heating elements dry burns them out in under 30 seconds.
-
Storing Flammable Chemicals Near Gas Water Heaters: Storing paints, solvents, or gasoline near open gas pilot lights creates severe fire hazards.
-
Skipping Thermal Expansion Tank Installation: Forces thermal expansion spikes directly against tank welds, shortening tank life.
-
Hiring Unlicensed Handymen for Water Heater Replacement: Unlicensed work often violates DC plumbing codes, lacks liability insurance, and risks improper venting.
-
Using Chemical Drain Cleaners Near Water Lines: Corrosive drain chemicals can splash or corrode nearby metallic fittings and drains.
-
Forgetting to Test the T&P Relief Valve Annually: Un-tested valves can seize closed due to hard water scale deposits.
-
Neglecting Hard Water Flush Maintenance: Allowing inches of mineral sediment to harden into solid rock on the tank floor.
-
Placing Water Heaters Directly on Uninsulated Concrete: Promotes thermal loss and accelerates bottom jacket rust.
-
Over-Tightening Brass and Copper Plumbing Joints: Strips soft brass threads or cracks plastic fittings, causing immediate hidden drips.
-
Delaying Professional Service During an Active Leak: Waiting hours to call an emergency plumber increases structural water damage exponentially.
Practical Maintenance Tips to Prevent Water Heater Leaks
Proactive seasonal care extends water heater lifespan and protects your home from unexpected flooding:
Daily & Monthly Care
-
Keep the area surrounding your water heater clean, dry, and unobstructed by household storage items.
-
Visually check top water pipe connections, brass valves, and lower drain spigots once a month for signs of white mineral crust or rust.
-
Verify that your water heater thermostat is set to 120°F (49°C) for optimal balance between energy efficiency and tank protection.
Seasonal & Annual Maintenance
-
Flush the Tank Annually: Drain 3 to 5 gallons of water from the lower drain valve into a bucket once a year to clear soft mineral sediment.
-
Test the T&P Relief Valve: Lift the lever on the temperature and pressure relief valve briefly to confirm water discharges freely and resets cleanly.
-
Inspect the Sacrificial Anode Rod: Have a plumber inspect or replace the internal anode rod every 3 to 5 years (more frequently if using water softeners).
-
Check Expansion Tank Pressure: Verify that air pressure inside your thermal expansion tank matches incoming household water pressure.
-
Install Wireless Leak Alarms: Place an inexpensive battery-powered water sensor on the floor inside your water heater drain pan for instant smartphone alerts.
When Should You Call an Emergency Plumber?
Contact an emergency plumber immediately if you encounter any of the following urgent conditions:
-
Water Spraying or Rapidly Pooling from the Heater: High-volume leaks escaping from top connections, cracked tanks, or failed valves.
-
Water Dripping Through Ceilings or Walls: Leaks penetrating floors and threatening structural drywall or electrical fixtures below.
-
Smell of Natural Gas Near the Water Heater: A rotten-egg gas smell indicates a gas line breach—evacuate immediately and call gas utilities and emergency services.
-
Electrical Sparking, Burning Odors, or Scorch Marks: Electrical shorts occurring at heater junction boxes or thermostats.
Frequently Asked Questions
Why is my water heater leaking from the bottom?
A leak at the bottom of the heater usually indicates either a loose drain valve, a failing lower heating element gasket, or an un-repairable inner steel tank fracture caused by internal corrosion.
Can a leaking water heater be repaired, or does it always need replacement?
If the leak originates from top pipe fittings, dielectric unions, thermal expansion tanks, or temperature-and-pressure relief valves, it can be repaired. If the inner steel tank itself has corroded through, the entire unit must be replaced.
How long do standard water heaters last in Washington, DC?
Standard tank water heaters in the DC metro area typically last between 8 and 12 years due to mineral content and thermal expansion stress. Tankless units can last 15 to 20 years with routine descaling.
Is a leaking water heater considered a dangerous emergency?
Yes. Beyond severe water and structural damage, leaking water heaters can cause electrical short circuits, scalding injuries, toxic mold growth, and localized flooding in upper-floor condos.
What causes a water heater pressure relief valve to leak?
T&P valves leak either because internal household water pressure exceeds 80 PSI, water temperature is dangerously high, thermal expansion is unmanaged, or mineral scale is preventing the valve seat from sealing cleanly.
How do I turn off my water heater in an emergency?
Shut off cold water flow by turning the top inlet valve clockwise. For electric units, turn off the breaker at your main panel. For gas units, turn the gas control knob on the heater thermostat to "OFF".
How much does it cost to replace a water heater?
Plumbing repair and replacement costs vary depending on the severity of the problem, accessibility, materials required, emergency service, property type, and local labor rates.
What happens if I turn off the water to my water heater but leave the power on?
Leaving power on to an electric water heater without water inside will burn out the heating elements within seconds. Always switch off electrical power before draining a tank.
Why does my hot water look brown or rusty?
Rusty hot water indicates that either the internal sacrificial anode rod is completely depleted and the steel tank is corroding, or old galvanized supply lines in your home are deteriorating internally.
Can I replace a water heater myself in Washington, DC?
Water heater installations in DC require compliance with local plumbing codes, proper gas or electrical connections, and expansion tank installation. Having a licensed plumber perform the work ensures safety, legal compliance, and valid warranty coverage.
Why Choose plumber in Washington DC?
When a leaking water heater threatens your property in Navy Yard or surrounding DC communities, you need a responsive local plumbing partner equipped with modern diagnostic technology.
At plumber in Washington DC, we provide reliable, expert emergency plumbing services tailored to urban condominiums, townhomes, and commercial spaces across Washington, DC, including Navy Yard, Capitol Hill, Southwest Waterfront, Buzzard Point, Anacostia, Mount Vernon Triangle, and Ward 6.
-
Navy Yard & High-Rise Expertise: We are experienced in working within condo utility closets, coordinating building shutoffs, and navigating urban multi-family building requirements.
-
24/7 Emergency Mobilization: Our licensed emergency plumbers are on standby around the clock to isolate water leaks rapidly and protect your home from water damage.
-
Upfront Flat-Rate Estimates: We perform non-invasive diagnostic evaluations and provide itemized estimates before starting any repair or replacement work.
-
Modern Flameless Equipment: We utilize HD thermal cameras and flameless hydraulic press tooling (ProPress) to make fast, safe copper connections in tight living spaces.
-
Fully Licensed & Insured: All repairs and installations are completed strictly to District of Columbia plumbing codes with full liability coverage and quality guarantees.