Introduction
Nothing disrupts a morning routine quite like opening the freezer to find a bone-dry ice bin, followed closely by the discovery of a slow, silent leak warping your hardwood kitchen floor. For property owners in the District, handling kitchen appliance upgrades can quickly turn into a frustrating maze of tight spaces, corroded shut-off valves, and potential water damage. Getting a reliable ice maker water line installation in Washington DC isn't just about convenience—it is about protecting your home's structure from hidden moisture intrusion.
Rowhouses and historic properties across the District present unique layout challenges, from cramped kitchens with aging galvanized supply pipes to modern luxury condos requiring strict HOA compliance. When a refrigerator water line fails or is installed incorrectly, the resulting pooling water can quickly ruin subfloors, rot cabinetry, and foster dangerous mold growth. Understanding how this vital connection works, recognizing warning signs of a failing line, and knowing when to call a professional will save you from costly emergency repairs down the road.
What Is Ice Maker Water Line Installation? Decoding the Mechanism
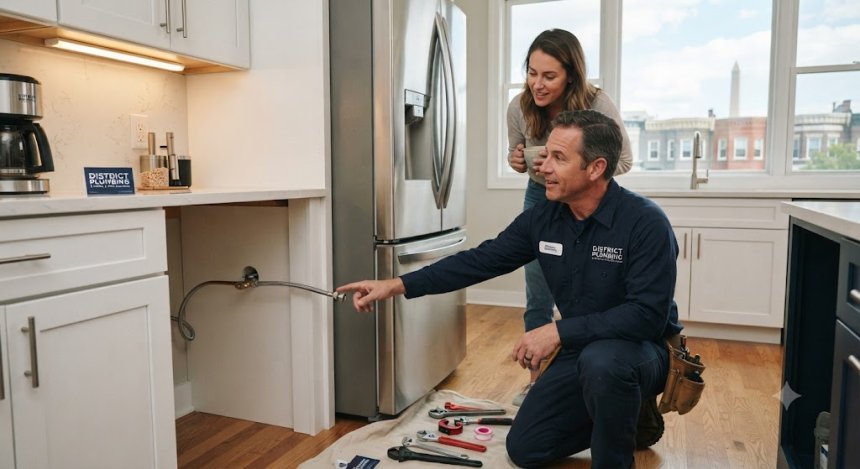
At its core, an ice maker water line is a small-diameter supply tube—typically made of food-grade copper, braided stainless steel, or flexible cross-linked polyethylene (PEX)—that connects your home’s pressurized water supply to the inlet valve on the back of your refrigerator.
-
The Ideal Mechanism: When your freezer's electronic control board signals that the ice mold needs water, a small solenoid valve opens. Water flows smoothly through the supply line, fills the tray, freezes, and is automatically harvested into the bin.
-
When It Fails: Problems arise when rigid plastic lines crack due to brittleness, compression fittings loosen from normal appliance vibrations, or saddle valves pierce-clog over time. Instead of fresh ice, you end up with restricted flow, loud humming noises, or a catastrophic leak hidden behind heavy kitchen appliances.
Picture a historic rowhouse in Capitol Hill: a homeowner tries to slide their new refrigerator into a tight alcove, unknowingly kinking an old, rigid plastic supply tube. Within a week, micro-fractures in the plastic give way, sending a steady stream of water underneath the baseboards and into the dining room floor joists.
Professional Diagnostic & Repair Workflow
When you partner with a licensed plumbing team to handle your kitchen utility connections, the process follows a rigorous, step-by-step protocol designed to eliminate guesswork and protect your property:
-
Step 1: Non-Invasive Triage & Safety Isolation
The technician locates and shuts off the dedicated water supply valve, inspecting the immediate area for existing moisture, electrical hazards, or wall cavity damage.
-
Step 2: Precision Diagnostic & Digital Video Inspection
If the line runs beneath floorboards or through finished cabinetry, micro-inspection scopes and moisture meters are deployed to verify that surrounding materials are completely dry.
-
Step 3: Transparent, Upfront Options & Written Estimating
You receive a clear, flat-rate pricing breakdown detailing whether a simple supply line upgrade, valve replacement, or complete rerouting is required.
-
Step 4: Code-Compliant Remediation & Part Replacement
The plumber installs durable, burst-resistant braided stainless steel lines, modern quarter-turn ball valves, and secure air gaps where mandated by local plumbing codes.
-
Step 5: Pressure Testing, Flow Verification, & Clean-Up
The system is pressurized, thoroughly tested for leaks over a sustained period, and the workspace is left immaculate.
Critical Warning Signs: When Your Home is Sounding the Alarm
Kitchen appliance supply leaks rarely announce themselves with a gushing geyser initially. Instead, they give subtle, easy-to-miss hints that require immediate attention:
-
Subtle Structural Shifts & Damp Patches: Noticeable cupping in wood flooring near the refrigerator, spongy baseboards, or unexplained spikes on your monthly municipal water utility bill.
-
Auditory Clues: Battering water hammer noises when the ice maker solenoid valve snaps shut, or faint hissing sounds indicating a pinhole leak under continuous pressure.
-
Olfactory Indicators: A musty, damp earth, or mildew smell lingering around the refrigerator base, pointing to trapped moisture breeding mold behind heavy cabinetry.
Ignoring these early warnings allows moisture to compromise structural subflooring, weaken wall framing, and trigger toxic mold colonies that threaten indoor air quality.
DIY Reality Check: What You Can Safely Fix vs. When to Step Back
It is completely natural to want to tackle simple home maintenance tasks yourself, but plumbing behind appliances carries hidden risks.
-
Safe Homeowner Actions: Pulling the refrigerator forward (carefully, without crushing cords), checking if the external power plug is secure, or tightening an easily accessible compression nut by hand if a minor drip appears at the connection point.
-
The Danger Zone: Piercing a main water pipe with cheap saddle valves, over-tightening fittings until threads strip, or working blindly behind units where electrical outlets and water lines intersect.
-
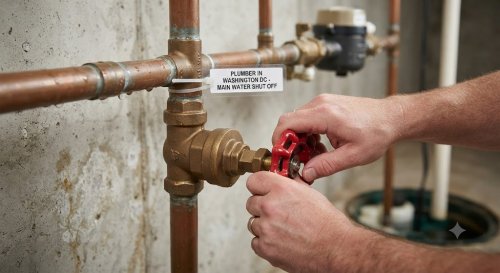
When to Drop the Wrench: If your shut-off valve is stuck, corroded, or spinning freely without stopping the flow of water, shut off your home's main water supply immediately and call a licensed professional to prevent a flood.
Financial Breakdown: Cost Factors & Investment Realities
Professional plumbing services rely on transparent, flat-rate pricing structures that reflect the scope of work rather than open-ended hourly billing. Several key variables influence the final investment for ice maker line installations:
-
Diagnostic & Dispatch Fees: Standard service call costs covering travel and initial technician evaluation.
-
Line Accessibility & Length: Running a new line through a finished basement or a crawlspace requires more labor than connecting to an existing stub-out directly behind the fridge.
-
Material Quality: Upgrading from cheap plastic tubing to high-grade braided stainless steel lines and quarter-turn brass ball valves.
-
Valves & Pressure Management: Installing new water hammer arrestors or replacing seized shut-off valves.
Investing in professional installation protects you from the thousands of dollars in water damage typically caused by DIY plumbing failures.
Unique Expert Insights: Hard Truths Homeowners Learn Too Late
Years of hands-on fieldwork reveal several hard truths about kitchen plumbing that every property owner should keep in mind:
-
Temporary Patch Kits: Using rubber tape or makeshift hose clamps on a leaking supply line is a ticking time bomb that frequently voids home insurance coverage clauses.
-
The Saddle Valve Trap: Cheap piercing saddle valves installed decades ago inevitably clog with mineral scale or snap off, causing sudden basement or kitchen flooding.
-
Hidden Code Violations: DIY installations often bypass backflow prevention or proper air gap standards, creating issues during future real estate sales and home inspections.
-
Preventive Upgrades: Replacing old plastic or copper tubing proactively costs a tiny fraction of a single emergency midnight water extraction service.
Comprehensive Home Plumbing Maintenance Framework
Keeping your entire home plumbing system running smoothly requires a structured, seasonal approach to maintenance:
-
Spring & Summer Checks:
-
Inspect outdoor hose bibs and spigots for winter freeze cracks.
-
Test sump pump operation and check discharge lines.
-
Verify proper exterior ground grading away from foundation walls.
-
-
Fall & Winter Preparation:
-
Disconnect and drain all outdoor garden hoses.
-
Insulate vulnerable pipes running through unheated crawlspaces or exterior walls.
-
Flush your water heater tank to remove sediment buildup.
-
-
Year-Round Habits:
-
Install and clean sink strainers to catch food debris.
-
Monitor your water meter periodically for unexpected consumption spikes.
-
Avoid harsh chemical drain cleaners that degrade pipe interiors.
-
Emergency Protocol: When Immediate Dispatch is Non-Negotiable
Some plumbing situations cannot wait until regular business hours. You need an immediate 24/7 emergency dispatch if you encounter:
-
Catastrophic supply line ruptures causing active structural flooding across your kitchen or living areas.
-
Complete main sewer line backups flooding living spaces.
-
Total loss of potable water supply to the home.
-
Overflowing fixtures or leaks actively threatening electrical outlets and major breaker panels.
Frequently Asked Questions (FAQs)
Can I use a plastic tube for my ice maker water line?
While flexible plastic tubing was common years ago, modern plumbing best practices strongly discourage it. Plastic becomes brittle over time, making it highly susceptible to splitting, kinking, and bursting. Licensed plumbers recommend durable, burst-resistant braided stainless steel lines.
Where does the ice maker water line connect to my house plumbing?
Typically, the line taps into the nearest pressurized water pipe—often under the kitchen sink, in the basement directly below, or via a dedicated supply stub-out box recessed into the wall behind the refrigerator.
Do I need a pressure-reducing valve for my ice maker line?
Most residential water pressure ranges between 40 and 80 PSI. If your home experiences high water pressure surges (above 80 PSI), installing a pressure-reducing valve (PRV) or water hammer arrestor protects your refrigerator's delicate internal inlet valves from premature failure.
How often should refrigerator water supply lines be replaced?
Braided stainless steel supply lines should generally be inspected annually and replaced every 5 to 7 years, or immediately whenever you purchase a new refrigerator.
Will a professional installation include leak testing?
Yes. A licensed plumber will always pressurize the new line, check all connection points with specialized moisture meters, and run test cycles on the ice maker before wrapping up the job.
Can a leaking ice maker line cause mold behind cabinets?
Absolutely. Because leaks behind refrigerators are often hidden from view, moisture lingers in dark, warm spaces, creating an ideal breeding ground for toxic mold within 24 to 48 hours.
What is a quarter-turn valve and why is it better?
Traditional multi-turn gate valves often seize up or leak around the packing nut over time. A modern quarter-turn ball valve allows you to completely shut off water to the refrigerator with a simple 90-degree turn, ensuring reliability in an emergency.
Is a permit required to install a refrigerator water line in Washington DC?
Simple replacement of an existing flexible supply line typically does not require a permit. However, running brand-new supply piping through walls or structural framing may require adherence to local District plumbing codes.
Why Homeowners Trust Our Expert Plumbing Services
Navigating kitchen renovations and appliance hookups requires skill, precision, and local expertise. Property owners across the region rely on professional plumbing teams for several key reasons:
-
Fully licensed, insured, and background-checked technicians who respect your home.
-
Upfront, flat-rate pricing with zero hidden overtime surprises or gimmicks.
-
State-of-the-art diagnostic and installation equipment that guarantees code compliance.
-
Deep local experience serving historic properties, modern condos, and suburban single-family homes alike.
-
Customer-first warranty and satisfaction commitments that give you total peace of mind.