Introduction
There is nothing quite as frustrating as finishing a wonderful home-cooked meal only to watch your kitchen sink fill up with dirty, stagnant water because your food waste unit refuses to budge. When a kitchen sink gets crippled by a jammed or dead food waste unit, meal cleanup grinds to an absolute halt, and everyday kitchen routines turn into stressful chores. Property owners frequently experience this because internal impellers seize up, electrical switches fail, or cumulative kitchen grease binds the grinding ring. Immediate attention matters because a stalled motor can quickly overheat, trip your circuit breakers, or leak wastewater directly into your kitchen cabinet substrate, causing extensive mold and structural wood rot.
Local residents in the capital search for professional garbage disposal installation in Washington DC solutions because our urban homes feature unique spatial constraints, older cabinetry, and strict local electrical plumbing codes that require precision engineering to protect historic and modern properties alike.
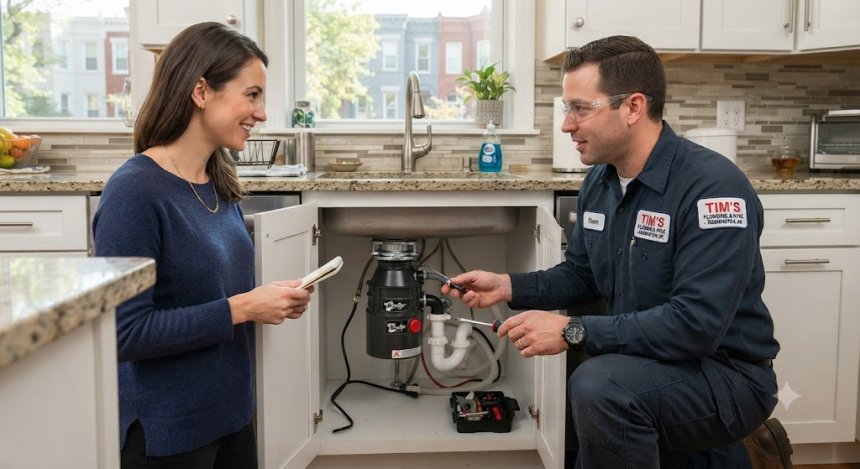
What Is Garbage Disposal Installation? Decoding the Mechanism
At its core, a garbage disposal is an electromechanical appliance mounted underneath your kitchen sink basin designed to shred food waste into minuscule particles—typically smaller than two millimeters—so they can flow safely through the municipal drainage network. Unlike common misconceptions, modern units do not use sharp blades; instead, they rely on heavy metal impellers mounted on a spinning flywheel that force food scraps outward against a stationary grinding ring using centrifugal force.
When a system works correctly, organic waste drops effortlessly into the chamber, mixes with running cold water, gets pulverized within seconds, and flushes down the drain line. When it fails, either the motor hums without spinning due to a jammed flywheel, the lower reset button continually trips, or internal seals rupture, causing water to pool rapidly across your cabinet floor. Consider a busy rowhouse kitchen in Capitol Hill: a family crams fibrous potato peels and celery stalks down a builder-grade 1/3-horsepower unit, overwhelming the motor torque and fracturing the mounting assembly under the sink strain.
Root Causes: Why This Problem Occurs in Urban Homes
While mechanical wear is inevitable, specific environmental and structural factors native to our region accelerate premature unit failure and installation challenges:
-
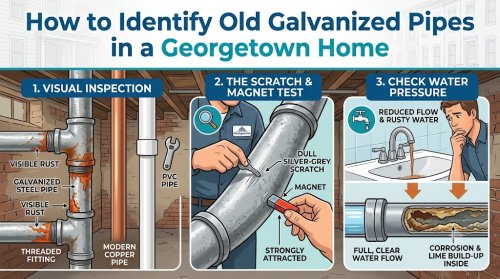
Aging Infrastructure & Historic Piping: Many local properties feature older galvanized steel or cast iron drain lines that possess rough interior walls, making them prone to catching particulate matter if a disposal fails to grind waste finely enough.
-
Hard Water Mineral Scaling: Regional water hardness leaves behind calcium and magnesium carbonate deposits that encrust the interior grinding chamber, stiffening seals and seizing up moving mechanical components.
-
Municipal Water Pressure & Flow Fluctuations: Inconsistent water supply dynamics can trick homeowners into running insufficient water volumes during grinding cycles, leaving thick sludge stranded in horizontal branch drain lines.
-
Thermal Stress & Electrical Variations: Aging urban grid transformers and older home wiring can deliver unstable voltage, causing disposal motor windings to overheat and burn out prematurely.
-
Cabinet Shift & Settlement: Settling foundations in historic rowhouses can slowly pull sink basins out of alignment with rigid PVC discharge tubes, placing chronic shearing stress on rubber gaskets and mounting flanges.
Critical Warning Signs: When Your Home is Sounding the Alarm
Ignoring early mechanical distress flags can turn a simple swap-out into a major kitchen renovation. Watch out for these sensory indicators:
-
Auditory Clues: Loud metallic clanging, abnormal grinding noises, or a persistent humming sound accompanied by zero flywheel movement.
-
Olfactory Indicators: Foul, stagnant rotting food odors emanating from the sink flange even after running the unit, signaling trapped organic film buildup beneath the rubber splash baffle.
-
Visual & Structural Red Flags: Slow draining accompanied by gurgling sounds, recurring damp patches or puddles forming on the cabinet floor, and visible corrosion around the bottom motor housing.
Delaying intervention lets hidden leaks rot out particleboard cabinet bases, invites unhygienic pest infestations, and risks short-circuiting electrical connections tucked right beneath the basin.
Financial Breakdown: Cost Factors & Investment Realities
Understanding the financial architecture of upgrading or installing a new waste disposal system helps you budget effectively. Total project pricing is dictated by several variables:
-
Diagnostic & Dispatch Fees: Standard service call rates covering travel and initial assessment of your existing electrical and plumbing layout.
-
Unit Horsepower & Tier: Choosing between basic 1/3 HP models, heavy-duty 1/2 to 3/4 HP units, or premium continuous-feed vs. batch-feed systems with sound-insulation tech.
-
Electrical Modifications: Whether your under-sink area requires a dedicated GFCI outlet installation or rewiring by a licensed technician.
-
Plumbing Adaptations: Rerouting tailpieces, traps, or adding dishwasher inlet connections to accommodate non-standard sink depths or double-basin configurations.
-
Repair vs. Total Replacement: In many cases where a motor housing is cracked or past its 10-year lifespan, total fixture replacement is far more cost-effective than attempting individual part rebuilds.
Professional Diagnostic & Repair Workflow
When you partner with a seasoned master plumber, you receive a systematic, code-compliant approach to resolving your kitchen waste challenges:
-
Step 1: Non-Invasive Triage & Safety Isolation: Technicians safely cut power at the breaker panel and inspect the physical integrity of the sink flange, mounting bolts, and electrical whip.
-
Step 2: Precision Diagnostic Assessment: Evaluating motor electrical continuity, testing the manual hex-wrench reset socket, and inspecting discharge lines for internal blockages.
-
Step 3: Transparent, Upfront Options & Written Estimating: Presenting clear, flat-rate pricing choices for repairing minor jams versus upgrading to a high-efficiency new unit.
-
Step 4: Code-Compliant Remediation & Installation: Safely unmounting the old unit, replacing deteriorating plumber's putty seals, locking down the new mounting assembly, and securing slip-joint PVC drainage.
-
Step 5: Pressure Testing, Flow Verification, & Cleanup: Running full operational stress tests with hot and cold water streams, checking for micro-leaks, and leaving your workspace spotless.
Advanced Diagnostics: The Professional Tool Arsenal
Professionals rely on specialized hardware to ensure absolute precision, eliminating guesswork and protecting your property:
-
Digital Multimeters: Used to verify exact voltage delivery at the under-sink outlet and test motor winding resistance.
-
High-Definition Push-Rod Drain Cameras: Deployed when a disposal backup has forced debris deep into the main kitchen branch line, identifying hidden grease blockages.
-
Basin Wrench Sets: Specialized long-reach tools designed to safely tighten hard-to-reach sink mounting nuts without warping porcelain or stainless steel basins.
-
Manometers & Pressure Testing Gauges: Ensuring complete hydraulic integrity across newly fitted drainage connections.
DIY Reality Check: What You Can Safely Fix vs. When to Step Back
While handling minor kitchen fixes can be empowering, understanding your limits keeps you safe:
-
Safe Homeowner Actions: Safely pressing the red reset button underneath the unit, using an Allen wrench manually in the bottom shaft to clear a jammed flywheel, or clearing the removable rubber splash guard for hand-washing.
-
The Danger Zone: Never stick bare hands into the grinding chamber, never ignore water dripping near electrical wires, and avoid forcing corroded, rusted-out mounting flanges that can snap and collapse your entire sink strainer assembly.
-
When to Call a Pro: If the motor housing is leaking internally, if your wiring lacks a proper grounded outlet, or if you are switching from a non-disposal sink configuration that requires cutting cast iron or PVC sanitary tees.
Unique Expert Insights: Hard Truths Homeowners Learn Too Late
Over decades in the field, master plumbers encounter recurring pitfalls that cost property owners dearly:
-
Temporary patch sealants applied to cracked disposal housings only buy a few days of time and frequently mask catastrophic seal failures that flood cabinets while you are away.
-
Chemical drain openers poured into a jammed disposal unit often splash back violently out of the sink flange, causing severe chemical burns and corroding metal components.
-
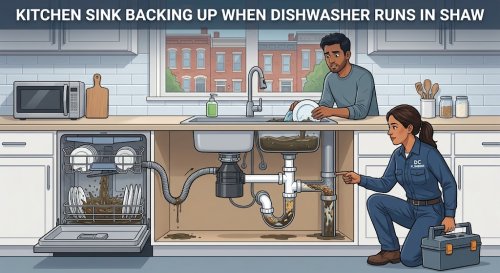
Unlicensed handymen frequently skip proper dishwasher knockout plug removal or fail to set high loop drain hoses, leading to contaminated wastewater backwashing directly into your dishwasher basin.
-
Preventative maintenance using ice cubes and citrus peels keeps grinding impellers sharp and clean, costing virtually nothing compared to an emergency midnight extraction service call.
Comprehensive Home Plumbing Maintenance Framework
Keep your kitchen ecosystem running smoothly with this seasonal and year-round maintenance checklist:
-
Spring & Summer Habits: Test your garbage disposal operation before hosting large summer gatherings; inspect under-sink supply lines for condensation or early seal weeping.
-
Fall & Winter Preparation: Avoid overloading units during heavy holiday cooking seasons with fibrous vegetables, grease, and bone fragments.
-
Year-Round Best Practices: Always run a strong stream of cold water for 15 seconds before and after operating your unit; clean the removable rubber baffle monthly with eco-friendly soap; never pour cooking grease, coffee grounds, or expanding starches down the drain.
Emergency Protocol: When Immediate Dispatch is Non-Negotiable
Some kitchen plumbing failures demand immediate emergency intervention to prevent severe property damage:
-
Active, pressurized water leaks spraying from the disposal housing directly onto electrical outlets or power strips.
-
Complete kitchen sink backups where wastewater overflows the basin and threatens hardwood flooring or lower cabinetry.
-
Burning electrical odors or sparking emanating from the under-sink motor assembly.
-
Total main drain blockages disabling every fixture on your primary kitchen level.
Frequently Asked Questions (FAQs)
Can I install a garbage disposal myself?
While handy homeowners with basic electrical and plumbing skills can replace an existing unit of the exact same brand and size, new installations or units requiring electrical outlet additions should always be handled by a licensed professional to ensure local code compliance and warranty validity.
Why does my garbage disposal hum but not spin?
A humming motor usually indicates that the internal flywheel is jammed by a foreign object or food debris. You can often resolve this by turning off the power, inserting a 1/4-inch hex wrench into the manual socket at the bottom center of the motor, and gently rocking it back and forth to free the jam.
How long do garbage disposals typically last?
A quality garbage disposal generally lasts between 8 to 12 years, depending on usage frequency, water hardness, and how strictly you follow proper food waste disposal guidelines.
Can I put vegetable peels and coffee grounds down my disposal?
Soft vegetable peels are fine in moderation, but stringy items like celery, artichokes, and corn husks can wrap around the impeller shaft. Coffee grounds should be avoided as they accumulate in dense sludge masses within older drain traps.
Why is my disposal leaking from the bottom motor housing?
If water is leaking directly from the bottom center or side of the motor casing itself, the internal mechanical shaft seals have failed. This is a non-repairable condition that requires total unit replacement.
Do I run hot or cold water when using a garbage disposal?
Always run cold water. Cold water solidifies any greases or fats present in the food waste, allowing the disposal's impellers to chop them into small particles before they can coat your pipe walls as liquid grease.
What size horsepower do I need for my kitchen?
For standard single-person or couple households, a 1/3 to 1/2 horsepower unit is usually sufficient. For busy families, avid home cooks, or heavy food preparation, upgrading to a 3/4 or 1-horsepower heavy-duty unit provides superior grinding torque and longevity.
Why does my disposal smell bad even after running it?
Foul odors are usually caused by an accumulation of organic food sludge trapped underneath the removable rubber splash baffle or clinging to the interior walls of the grinding chamber. Cleaning the baffle thoroughly and grinding ice cubes with lemon wedges helps clear the buildup.
Why Choose Professional Plumbing Services
Partnering with experienced local plumbing experts ensures your home receives the highest standard of care without unnecessary complications:
-
Fully licensed, insured, and background-checked technicians who respect your property and time.
-
Transparent, upfront flat-rate pricing with zero hidden overtime surprises or gimmicks.
-
Cutting-edge diagnostic equipment and professional-grade installation hardware.
-
Deep local expertise serving Washington DC neighborhoods with prompt, reliable scheduling.
-
Unwavering commitment to customer satisfaction backed by robust craftsmanship warranties.