Introduction
You step out of the shower expecting refreshed, clean skin, only to feel a tight, scratchy film on your arms. Your glassware comes out of the dishwasher covered in cloudy white spots, and your once-vibrant laundry feels stiff and abrasive. When hard water returns to your property suddenly, it usually points to a malfunctioning conditioning unit. Delaying professional water softener repair in Washington, DC exposes your entire plumbing infrastructure to aggressive mineral scaling, shortened appliance lifespans, and reduced fixture performance.
In the Washington, DC metropolitan area—from historic row houses in Georgetown and Capitol Hill to modern residences in Navy Yard—water treatment systems work under unique environmental pressures. Municipal water sourced from the Potomac River carries variable mineral loads, seasonal sediment shifts, and heavy treatment additives like chloramines. When a local water softener breaks down, calcium and magnesium immediately begin building up inside your water heater, tankless units, and copper lines. Understanding how your unit functions, recognizing early breakdown signals, and knowing when to call a licensed master plumber keeps your property protected and your water supply pristine.
What Is Water Softener Repair? Decoding the Mechanism
To understand what happens during a repair, you must first understand how an ion-exchange water softener functions when healthy. A standard system consists of two primary tanks: a mineral tank filled with thousands of tiny resin beads coated in sodium ions, and a brine tank filled with salt pellets dissolved in water.
The Ion-Exchange Process vs. Mechanical Breakdown
As hard water enters your home, it flows through the mineral tank. Calcium and magnesium ions naturally cling to the resin beads, displacing harmless sodium ions. Over time, the resin becomes saturated with minerals and must undergo a regeneration cycle, flushing the hard minerals down the drain with salt water from the brine tank.
[Hard Tap Water] ──► [Resin Bed (Ion Exchange)] ──► [Softened Household Water]
                            │
              (Saturates over time)
                            │
  [Brine Tank Salt Solution] ──► [Flushes Resin Bed] ──► [Drain Line Discharge]
When a water softener fails, this critical cycle breaks down. Common mechanical and chemical failure points include:
-
Control Valve Lockup: The digital or mechanical brain fails to trigger automatic backwashing.
-
Resin Bed Exhaustion: Chloramines in municipal tap water breakdown the chemical bonds of the resin, turning beads into mush.
-
Brine Draw Failure: Blocked injectors or faulty air checks prevent salt water from entering the resin tank.
-
Physical Leaks: Cracks in bypass valves, rotor discs, or tank seals leak water directly into your basement or mechanical room.
Real-World Local Scenario: In a historic Dupont Circle row home with a tight utility closet, a 10-year-old softener developed a hardened salt crust at the base of the brine tank. The unit continued clicking through its timer, but because salt could not dissolve, hard water flowed unchecked into the home's high-efficiency tankless water heater, clogging its heat exchanger with scale within three months.
Root Causes: Why Water Softener Failures Occur
Water softener systems do not fail at random. In Washington, DC homes, structural, municipal, and mechanical drivers accelerate system wear:
1. Municipal Water Additives & Chlorine Degradation
While municipal water processing renders drinking water safe, disinfectants like chlorine and chloramine attack synthetic polystyrene resin beads. Over time, these chemicals cause resin beads to swell, fracture, and turn into a gel-like sludge, drastically reducing water flow and ion exchange capacity.
2. Salt Bridging and Salt Mucking
High ambient humidity in unconditioned basements and mechanical spaces causes salt pellets to fuse into a solid dome above the water level—known as a salt bridge. Below the bridge, the tank holds empty space, preventing the unit from creating brine even though the tank looks full. Alternatively, cheap salt dissolves into a thick sludge at the bottom (salt mucking), clogging the brine draw tube.
3. Aging Municipal & Historic Home Piping
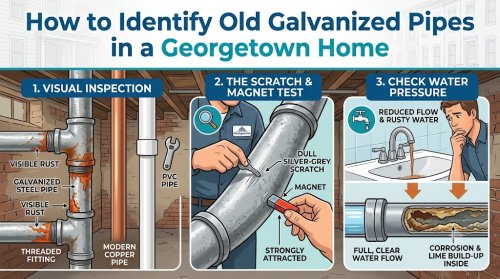
Many DC properties feature original galvanized steel or historic copper lines coupled with modern renovations. Fluctuating city water pressure and micro-sediment from aging street mains enter the control valve, scouring delicate rubber seals, scoring internal rotor discs, and blocking microscopic injector nozzles.
4. Continuous Hard Water Scaling
Ironically, hard water itself damages the valve components designed to treat it. Calcium deposits build up inside internal piston seals, bypass valves, and brine line fittings, eventually causing mechanical jams or structural casing cracks.
Critical Warning Signs: When Your System Is Sounding the Alarm
Recognizing early failure symptoms prevents severe household damage and costly appliance replacements. Pay attention to these primary sensory and operational indicators:
Visual & Physical Clues
-
Crusty White Scale: Fixtures, glass shower doors, and faucet aerators show chalky mineral build-up.
-
Stiff, Faded Laundry: Clothes feel rough, white fabrics look gray, and soap scum clings to textiles.
-
Dry Skin and Brittle Hair: Natural oils are stripped away due to unsoftened minerals reacting with soaps.
-
Resin Beads in Faucets: Tiny orange, gold, or translucent yellow beads clogging faucet aerators signal a torn distributor tube inside the softening tank.
Auditory & Operational Indicators
-
Continuous Running Water: The unit stays locked in regeneration mode, dumping hundreds of gallons down the drain line.
-
Grinding or Clicking Noises: Motor gears inside the electronic control head are slipping or jammed with scale.
-
Brine Tank Water Overflowing: Standing water rises near the top of the salt tank, indicating a clogged brine line or failed float safety valve.
Professional Diagnostic & Repair Workflow
When a licensed plumbing specialist addresses a water softener issue, they follow a systematic, safety-first diagnostic process:
[Step 1: Safety & Bypass] ──► [Step 2: Diagnostic Testing] ──► [Step 3: Component Inspection]
                                                                        │
[Step 5: Testing & Cleanup] ◄── [Step 4: Upfront Estimate & Fix] ◄──────┘
Step 1: Non-Invasive Triage & Safety Isolation
The technician isolates the system using the bypass valve assembly to restore raw water flow to the property without risk of flooding. Electrical connections are tested and isolated.
Step 2: Diagnostic Testing & Water Analysis
-
Grains Per Gallon (GPG) Testing: Samples are taken from both untreated tap water and post-softener outlets to calculate exact hardness removal efficiency.
-
Pressure Drop Evaluation: Water pressure is measured before and after the system to verify resin bed flow resistance.
Step 3: Precision Component Inspection
The plumber disassembles the main control valve, inspecting the internal piston, seal kit, rotor discs, and injector assembly. The brine tank float safety system and brine line are checked for vacuum leaks or physical blockages.
Step 4: Transparent, Upfront Options & Written Estimating
A clear repair plan is presented, detailing part replacement costs, resin bed re-bedding options, or valve head rebuilds versus full system replacement based on unit age.
Step 5: Code-Compliant Remediation, Pressure Testing, & Cycle Verification
Faulty components are replaced using manufacturer-approved parts. The system is pressurized, tested for leaks, manually forced through a complete regeneration cycle, and verified for correct draw and refill rates.
Advanced Diagnostics: The Professional Tool Arsenal
Professional plumbing technicians rely on commercial-grade diagnostic equipment to eliminate guesswork during water treatment service:
DIY Reality Check: What You Can Safely Fix vs. When to Step Back
Homeowners can easily handle routine user maintenance, but complex valve and pressure repairs require a licensed plumber.
       [SAFE FOR HOMEOWNERS]                     [CALL A LICENSED PRO]
 ┌────────────────────────────────┐       ┌────────────────────────────────┐
 │ • Breaking minor salt bridges  │       │ • Internal control valve rebuild│
 │ • Resetting digital clocks     │  VS   │ • Replacing fractured resin    │
 │ • Refilling salt levels        │       │ • Plumbing bypass line repair  │
 │ • Cleaning exterior tank surfaces│     │ • Fixing brine tank leaks      │
 └────────────────────────────────┘       └────────────────────────────────┘
Safe Homeowner Actions
-
Clearing Salt Bridges: Carefully push down on crusty salt layers using a dull wooden handle to break air pockets.
-
Timer Adjustments: Reset the controller clock after power outages or daylight saving time changes to ensure regeneration happens at 2:00 AM rather than during peak morning showers.
-
Basic Exterior Cleaning: Wipe down the brine tank rim and check that power cords are plugged into an active GFCI outlet.
The Danger Zone (When to Call a Professional)
-
Opening Sealed Valve Bodies: Tampering with spring-loaded control valves can strip plastic gear teeth or snap internal seals, causing catastrophic basement flooding.
-
Resin Replacement: Re-bedding high-capacity resin requires proper backwash channel setup, basket alignment, and sanitization to prevent bacterial contamination of drinking water.
-
Main Bypass Leaks: Cutting or re-soldering connections on brass or copper bypass valves requires licensing, soldering safety controls, and local plumbing code adherence.
Financial Breakdown: Cost Factors & Investment Realities
Water softener repair costs depend on unit accessibility, exact component failure, local labor rates, and part availability:
-
Diagnostic & Dispatch Fees: Covers the plumber's travel, initial water testing, and full system evaluation.
-
Minor Component Repairs: Cleaning injectors, replacing brine floats, or swapping motor drive gears fall on the lower end of repair investments.
-
Major System Overhauls: Replacing degraded resin beds, replacing electronic circuit boards, or installing complete control heads require higher component and labor investments.
-
Repair vs. Replacement Economics: If a water softener is under 8 years old, targeted repairs are usually the most cost-effective choice. If the unit exceeds 10 to 12 years of age and requires both valve and resin overhauls, investing in a modern, salt-efficient system offers superior long-term value.
Unique Expert Insights: Hard Truths Property Owners Learn Too Late
-
Cheap Salt Destroys Premium Valves: Inexpensive rock salt contains high levels of water-insoluble matter. Over time, these impurities form dirt sludge that clogs microscopic injector nozzles and tears internal rubber seals. Always use high-purity (99.6%) evaporated solar salt pellets.
-
Resin Migration Can Ruin Household Plumbing: When an internal bottom distributor basket cracks, thousands of tiny resin beads escape into your water lines. They fill water heater tanks, ruin mixing valves inside showers, and block single-handle faucets throughout the home.
-
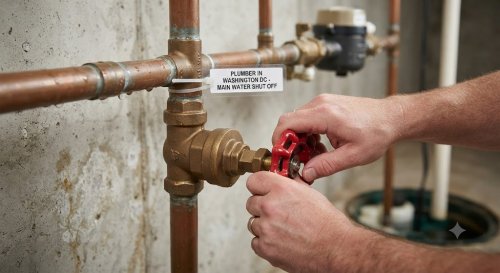
Bypass Valves Seize If Unused: If you never turn your bypass valve, hard water minerals lock the valve stem in place. When an emergency leak occurs, you won't be able to turn it. Exercise your bypass valve twice a year to keep seals lubricated and moving freely.
-
Oversized Systems Waste Money and Water: Installing an oversized water softener means the system regenerates infrequently, leading to resin channeling and bacterial growth. A system must be correctly sized to your household's actual peak flow rate and water hardness.
-
Municipal Chlorine Shortens System Life: Standard softening resin degrades rapidly in chlorinated water. Installing a whole-house activated carbon filter upstream of your softener neutralizes chlorine and chloramines, doubling the lifespan of your resin bed.
Emergency Protocol: When Immediate Dispatch is Non-Negotiable
Certain softener failures require an immediate emergency service response:
-
Active High-Pressure Water Leaks: A cracked valve casing or ruptured bypass line can discharge dozens of gallons per minute into finished living spaces.
-
Resin Discharge Into Water Lines: If golden beads start coming out of kitchen or bathroom faucets, turn off the softener bypass valve immediately to stop resin from spreading further into your home's pipes.
-
Continuous Uncontrolled Drain Discharge: A valve stuck in backwash mode flushes hundreds of gallons of water into sewer drains, running up high water bills and risking sewer line backing up.
-
Complete Loss of Household Water Pressure: A jammed internal piston can completely cut off water flow to your entire home.
Comprehensive Home Water & Plumbing Maintenance Framework
Follow this structured maintenance schedule to keep your water treatment equipment operating efficiently year-round:
Seasonal & Monthly Maintenance Schedule
Spring / Summer Tasks
-
Inspect brine tank for humidity-induced salt bridging.
-
Inspect outdoor spigot connections to ensure hose bibs bypass the softener (using softened water for garden irrigation wastes salt and damages plants).
-
Check brine tank float safety valve for free movement and clean away salt crusting.
Fall / Winter Tasks
-
Verify that indoor utility rooms maintain temperatures above freezing to protect water-filled softener tanks.
-
Reset digital timer clocks following daylight saving time adjustments.
-
Sanitize the resin bed using an industry-approved resin cleaner to strip accumulated iron and manganese.
Year-Round Best Practices
-
Keep salt levels at least one-third full, but never fill to the top rim.
-
Use only high-purity evaporated salt pellets or potassium chloride crystals.
-
Schedule an annual professional plumbing and water treatment checkup.
Frequently Asked Questions (FAQs)
Why is my water softener tank full of water?
A brine tank overflowing with water usually indicates a clogged brine injector, a stuck safety float valve, a blocked drain line, or a failure in the control valve's suction cycle.
How often should the resin in a water softener be replaced?
High-quality resin lasts 10 to 15 years under normal conditions. However, if your water contains high levels of chlorine or iron, the resin bed may degrade within 7 to 10 years.
Why does my tap water taste salty?
Salty water indicates that the system is failing to thoroughly rinse the brine out of the resin tank during the final phase of the regeneration cycle. This is usually caused by low water pressure or a clogged drain line.
Can a faulty water softener cause low water pressure?
Yes. If the internal resin beads disintegrate or become clogged with sediment, iron, or chlorine sludge, they block water flow, causing a sudden drop in water pressure across all fixtures.
How do I know if my softener is stuck in regeneration mode?
If you hear water continuously running down your drain tube for several hours and the control valve motor keeps humming or clicking, the unit is stuck in cycle and requires technical service.
Is it safe to drink water when the softener needs repair?
While unsoftened water is generally safe to drink, hardware breakdowns can release high sodium concentrations or resin beads into your supply. Put the unit on bypass mode until a professional evaluates it.
What is the difference between a salt bridge and salt mucking?
A salt bridge is a hard crust that forms above the water level, creating an empty space underneath. Salt mucking occurs when salt dissolves into a thick sludge at the bottom of the tank, blocking the brine intake valve.
Why is resin coming out of my showerhead and faucets?
This happens when the internal distributor basket at the bottom of the resin tank breaks, allowing the tiny resin beads to flow directly into your home's water distribution pipes.
Why Local Property Owners Trust Our Water Softener Repair Team
When water quality issues interrupt your daily routine, you need a team that combines real-world expertise with dependable service:
-
Licensed Master Plumbers: Every technician on our team holds full local plumbing licensure, backflow certification, and advanced factory training on leading water treatment systems.
-
Upfront, Flat-Rate Pricing: We provide detailed written estimates before any work begins. You will never face hidden fees or surprise overtime charges.
-
Local Water Expertise: We understand the exact water composition, mineral hardness levels, and plumbing configurations common across Washington, DC neighborhoods.
-
Fully Stocked Vans: Our service vehicles carry specialized tools, digital diagnostic meters, OEM control valves, replacement pistons, and high-purity replacement resin for fast, single-visit repairs.
-
Guaranteed Workmanship: We back our repair work with solid labor and part warranties, giving you total peace of mind that your home's water system is in expert hands.